Dog hair woven into seat fabric is one of those problems that looks simple until you try to remove it. You vacuum, the surface looks better for a moment, and then the light hits the carpet just right and there it is again. If you are searching for the best way to remove pet hair from a car, the real answer is not one tool or one trick. It is the right method for the material, the length of the hair, and how deeply it has worked into the fibers.
For most vehicles, pet hair is not sitting on top of the interior. It is embedded into carpet, wrapped around fabric loops, and pushed into seams by daily use. That is why basic vacuuming often falls short. A better approach combines loosening, lifting, and vacuum extraction in the right order.
The best way to remove pet hair starts with the surface
Pet hair behaves differently depending on where it lands. Short, stiff hair from some breeds can cling aggressively to carpet and trunk liners. Fine, soft hair often blankets cloth seats and slips into tight stitching. If your vehicle has leather or coated upholstery, the job is usually easier, but hair still gathers around edges, under seats, and along floor mats.
That matters because the best way to remove pet hair from one vehicle may not be the best way in another. Fabric seats and carpeted interiors usually need mechanical agitation before vacuuming. Smoother materials need careful brushing and detail work around creases so you remove the hair without scratching or scuffing trim.
Why regular vacuuming usually is not enough
A standard household vacuum or a quick pass at the car wash can remove loose debris, but pet hair tends to lock into fibers through friction and static. As people get in and out of the car, hair is pressed deeper into the material. Heat and humidity can make the problem worse, especially in New England where interiors see everything from wet winter coats to hot summer cabins.
This is why professional detailers rarely start and stop with suction alone. The goal is to break the bond between the hair and the fabric first. Once that happens, vacuuming becomes much more effective and much less frustrating.
What actually works on pet hair in car interiors
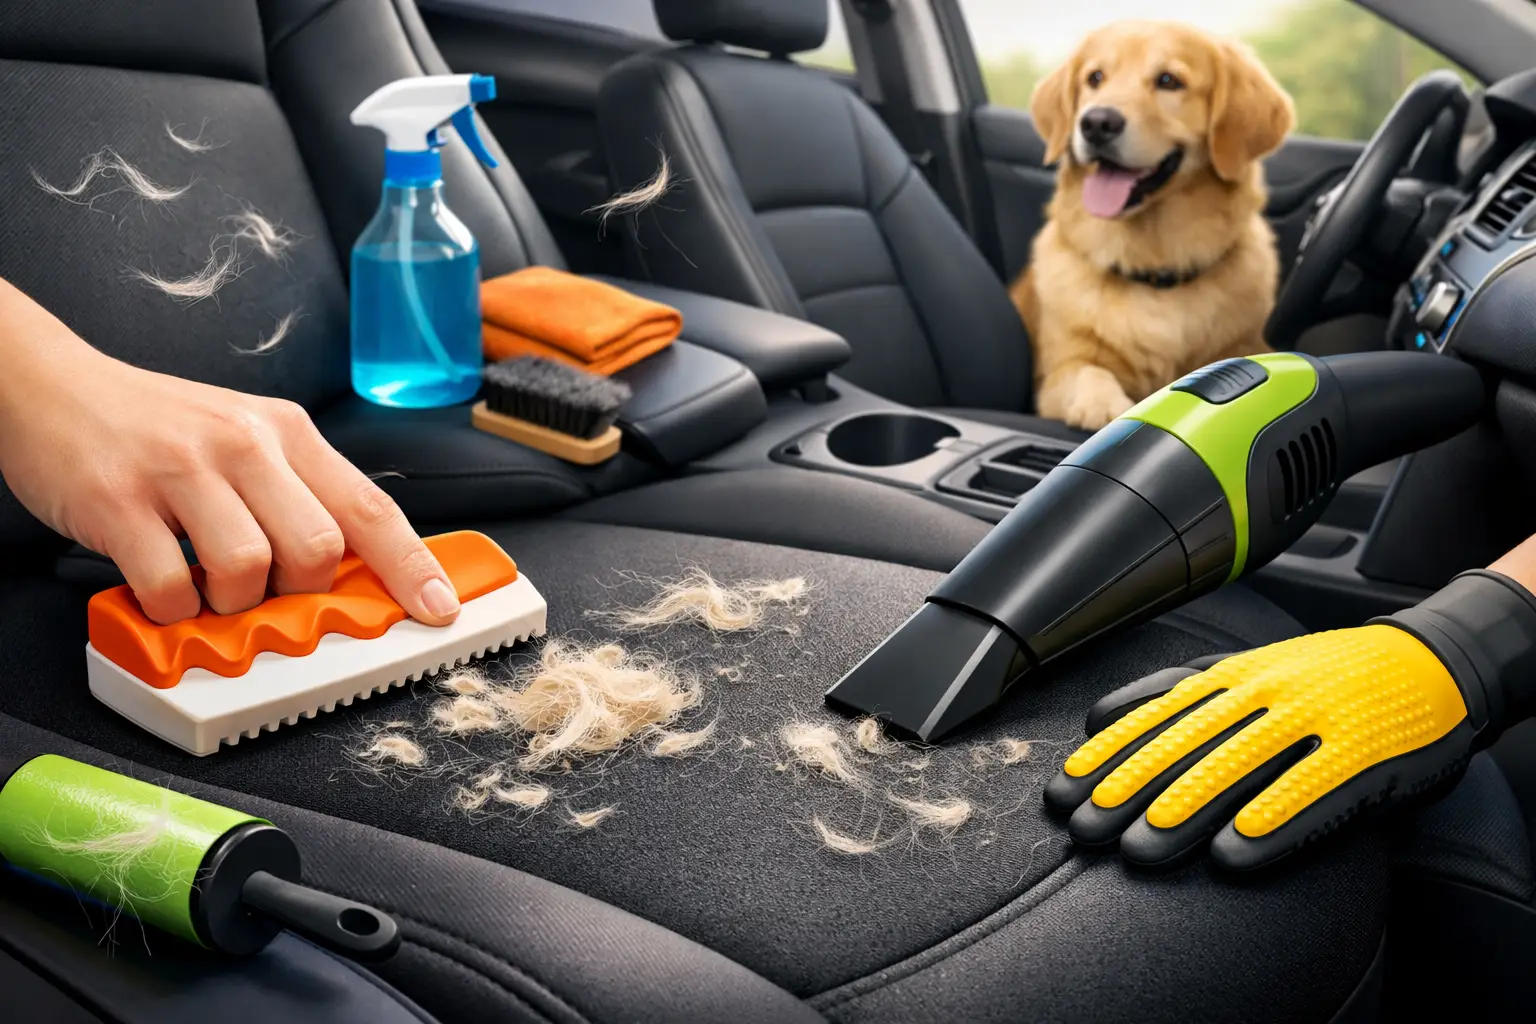
The most reliable process uses a rubber tool, a specialized pet hair brush, or a detailing glove to pull hair to the surface, followed by a strong vacuum to remove it. On heavily affected interiors, compressed air can help lift hair from seams and carpet backing before final extraction.
Rubber is effective because it creates friction without being overly aggressive on most interior materials. A rubber brush or pet hair removal stone can gather surprising amounts of hair quickly, especially on floor mats and trunk carpeting. On cloth seats, a gentler brush or glove is usually the safer choice. Too much pressure can fuzz delicate fabric, so technique matters as much as the tool.
Compressed air can be a game changer in tight areas. Hair hides along seat tracks, under trim edges, and between the seat base and backrest. Air helps push it out where it can be collected. That said, air alone can also scatter debris if the area is not controlled, so it works best as part of a system rather than a shortcut.
The best way to remove pet hair from cloth seats
Cloth seats are usually the hardest area because hair grips the weave and settles into seams. Start by moving the seats to expose as much surface area as possible. Lightly agitate the fabric with a rubber brush, pet hair brush, or nitrile glove, working in short strokes in one direction. This pulls the hair into visible clumps.
Once the hair is loosened, vacuum slowly with a crevice or upholstery attachment. Slow passes matter. Fast vacuuming leaves behind the very hair you just worked to lift. If there is still hair trapped in the weave, repeat the agitation with less pressure rather than pushing harder.
A damp microfiber towel can help as a finishing step, especially for fine hair that remains on the surface. It should be slightly damp, not wet. Too much moisture can push hair deeper or leave the seat needing extra drying time.
Removing pet hair from carpet and floor mats
Carpet usually responds well to more assertive agitation than seats. Rubber brushes, pumice-style pet hair tools made for automotive use, and even specialty detailing blocks can work well here. The key is matching the aggression of the tool to the carpet type. Durable floor mats can handle stronger friction. Softer carpet in premium interiors needs more care.
Pull the mats out of the vehicle when possible. It is easier to work thoroughly and you avoid redepositing debris into the cabin. Brush in short, consistent strokes until the hair gathers, then vacuum it away. For installed carpeting, work section by section so you can see progress and avoid missing edges near the center console and seat brackets.
If the carpet also has sand, dried mud, or food debris, remove that first. Mixed contamination makes the pet hair removal process slower because the hair gets tangled with everything else.
Leather, vinyl, and trim require a different approach
Hair usually does not embed into leather or vinyl the way it does into cloth, but it still sticks through static and collects in seams. In these areas, the best tool is often a soft brush, compressed air, or a vacuum with a crevice nozzle. A lightly damp microfiber towel can also gather stray hair without dragging it around.
Be careful with harsh tools on premium interiors. What removes hair quickly from a work truck floor may not be appropriate for soft leather seating or piano black trim. This is where experience saves time and prevents accidental wear.
Common mistakes that make pet hair harder to remove
One of the biggest mistakes is starting with aggressive vacuuming and skipping agitation. Another is using tools that are too rough for the material. Scrubbing harder does not always remove more hair. Sometimes it just frays the fabric and leaves the interior looking tired.
Another issue is tackling the job in poor lighting. Pet hair can disappear against dark carpet and then reappear in sunlight. Professional-level results come from checking the interior from multiple angles, especially on black seats and cargo areas.
There is also the question of time. A lightly used family SUV with one short-haired dog may be manageable at home. A vehicle that hauls multiple pets every week, especially during shedding season, can take much longer than owners expect. In those cases, the best way to remove pet hair may be to have the interior detailed properly and then maintain it before buildup returns.
When DIY works and when professional detailing makes sense
If the pet hair is light and mostly on the surface, a good brush and vacuum can get solid results. This is especially true if you stay ahead of it with regular cleanups. Seat covers, cargo liners, and quick maintenance between deep cleans can reduce how much hair gets embedded in the first place.
But if the hair has built up over months, if it is packed into every seam, or if you are preparing the vehicle for resale, trade-in, or a special event, professional detailing is often the more efficient option. A trained detailer has the tools, lighting, technique, and patience to remove what a rushed cleanup leaves behind. That is particularly important in luxury vehicles, family vehicles, and lease returns where interior presentation matters.
At SPS Autocare, this type of work is treated like any other detailing challenge – with the right process, the right tools, and attention to the details most people miss. That means pet hair is not just brushed around or partially vacuumed. It is addressed as part of restoring the interior to a cleaner, more comfortable standard.
Keeping pet hair under control after removal
The easiest pet hair removal job is the one that never becomes severe. If your dog rides with you often, brush them before travel when possible. Use a fitted seat protector or cargo liner that can be removed and cleaned separately. Vacuuming lightly every week is far easier than correcting months of buildup.
It also helps to schedule periodic interior detailing instead of waiting until the hair becomes overwhelming. Maintenance is not just about appearance. Pet hair can trap odor, dander, and debris that make the cabin feel less fresh over time.
The best way to remove pet hair is to treat it as a process, not a quick fix. Use the right tool for the surface, loosen the hair before vacuuming, and know when the job needs a professional hand. A cleaner interior feels better every time you open the door, and if you share your vehicle with a pet, that level of care pays off quickly.